
Great product photos are everything – whether you are using them on a blog, for sales, or to have your images re-pinned on Pinterest.
I am always looking to sharpen my skills. With a tight camera and lighting budget, I have to make do with what I have.
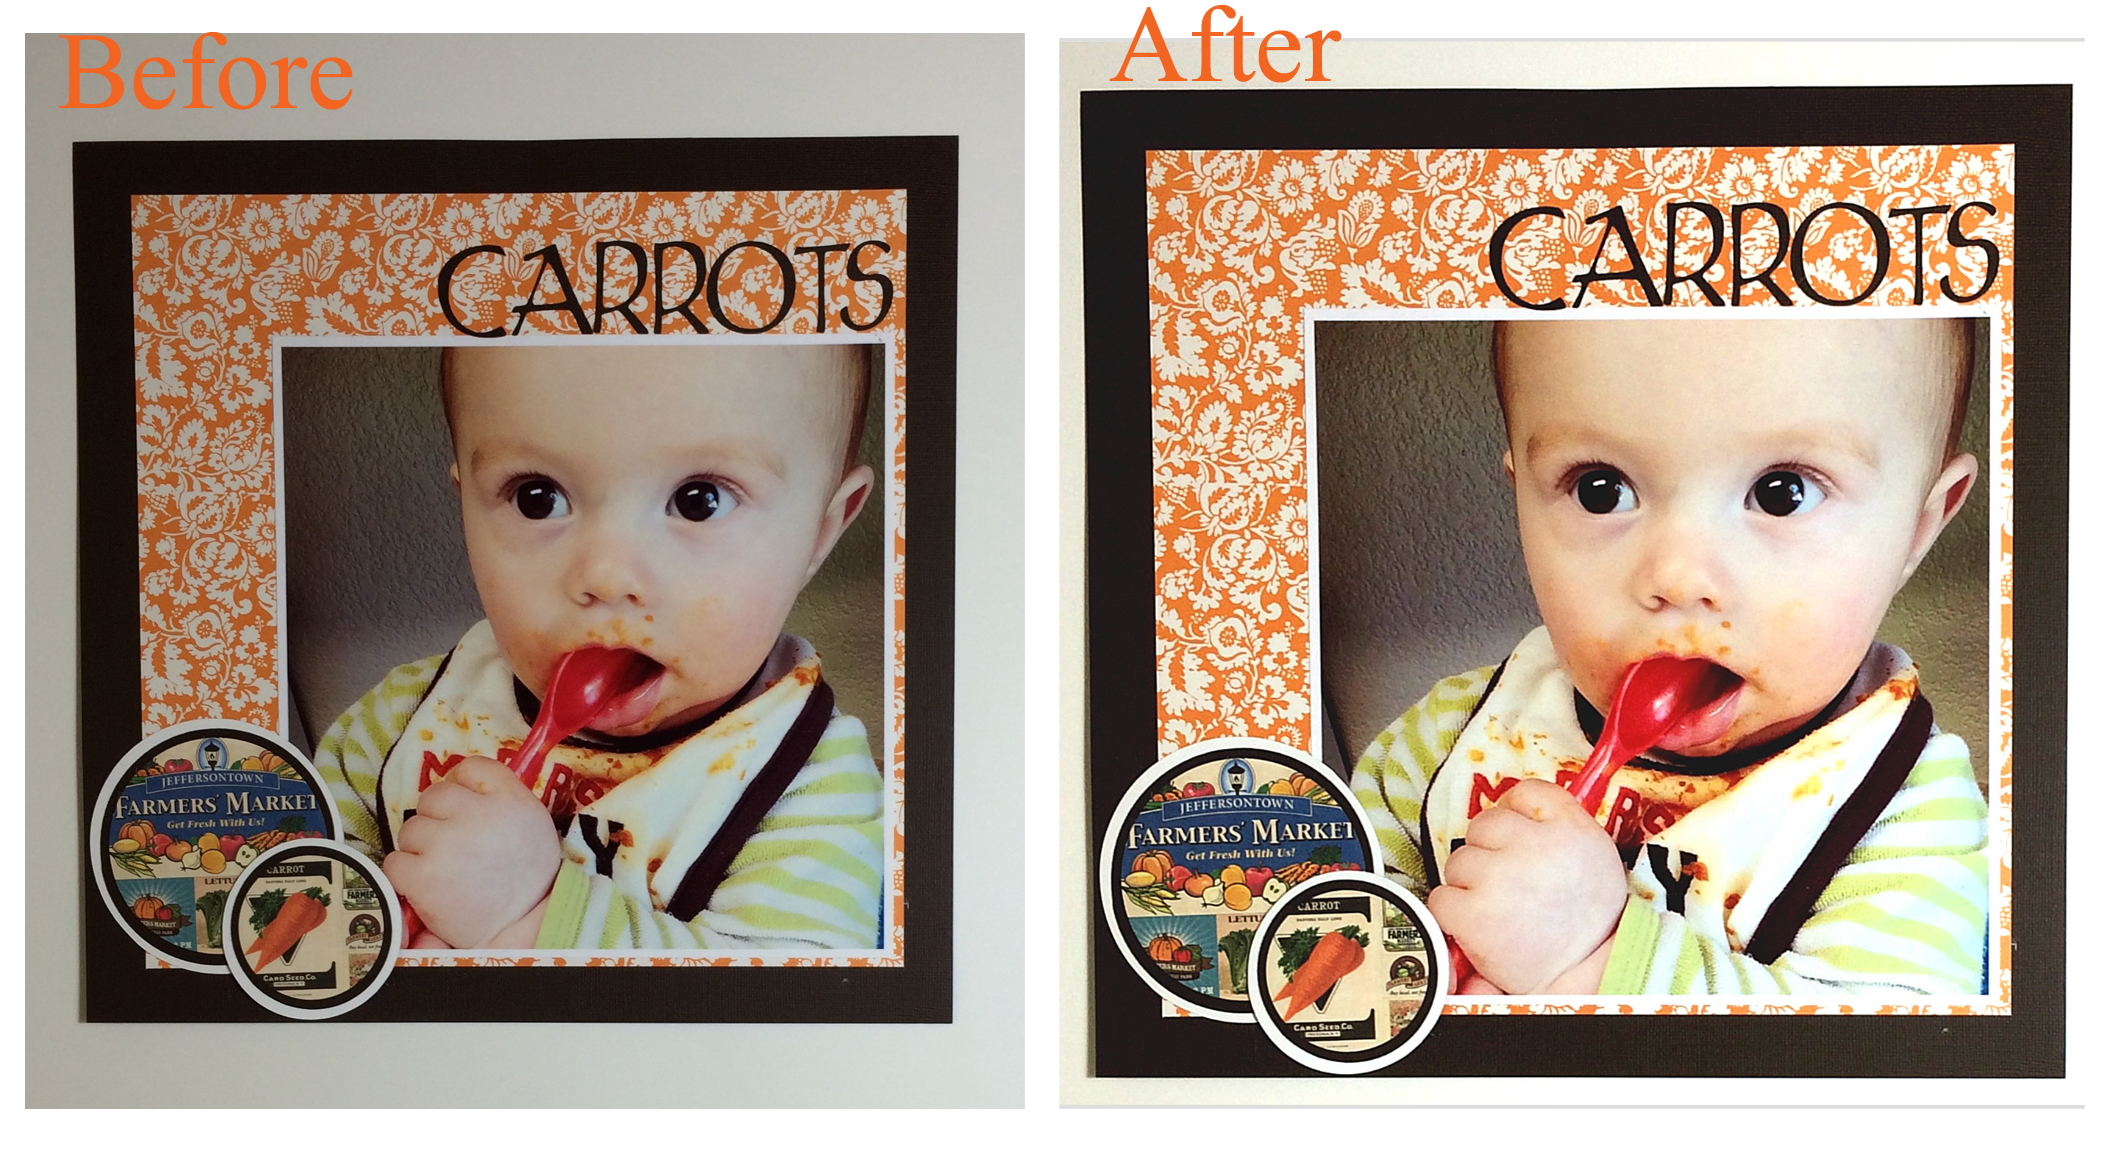
Below are some tips for using your iPhone to best show off your scrapbooking works of art. I used an iPhone 5s for these layouts.

1. Purchase a large white poster board from the craft store (around $1.00). It helps to clear the background in the pictures and provide a nice, neutral base. I like to use the shiny side too, in order to get the most out of my available light source.
2. Choose your poster board position carefully. As you can see, I like to have mine next to my craft room window. I also used a standing OTT light to the right, to help balance the light (you don’t want a lot of shadows).

3. Stick a piece of tape behind the layout and affix it to the board.
4. Take the photo using some kind of stabilizing structure. I don’t have a tri-pod, so I usually use my desk with a box on it to help hold the phone steady. Take several pictures so you can choose the best one.
5. I then clean up the image using either www.fotoflexer.com (a free site) or Afterlight (a $.99 app). You can use these to play with shadows and lighting, crop and rotate, etc. I also use Photoshop Elements 5.0 at the very end to add white paint to the background, making it as bright as possible.
That’s it! Now you can save and share your masterpieces!


1 thought on “How to Photograph Scrapbook Layouts Using an iPhone”