Great product photos are everything – whether you are using them on a blog, for sales, or to have your images re-pinned on Pinterest.
I am always looking to sharpen my skills. With a tight camera and lighting budget, I have to make do with what I have.
Below are some tips for using your iPhone to best show off your scrapbooking works of art. I used an iPhone 5s for these layouts.
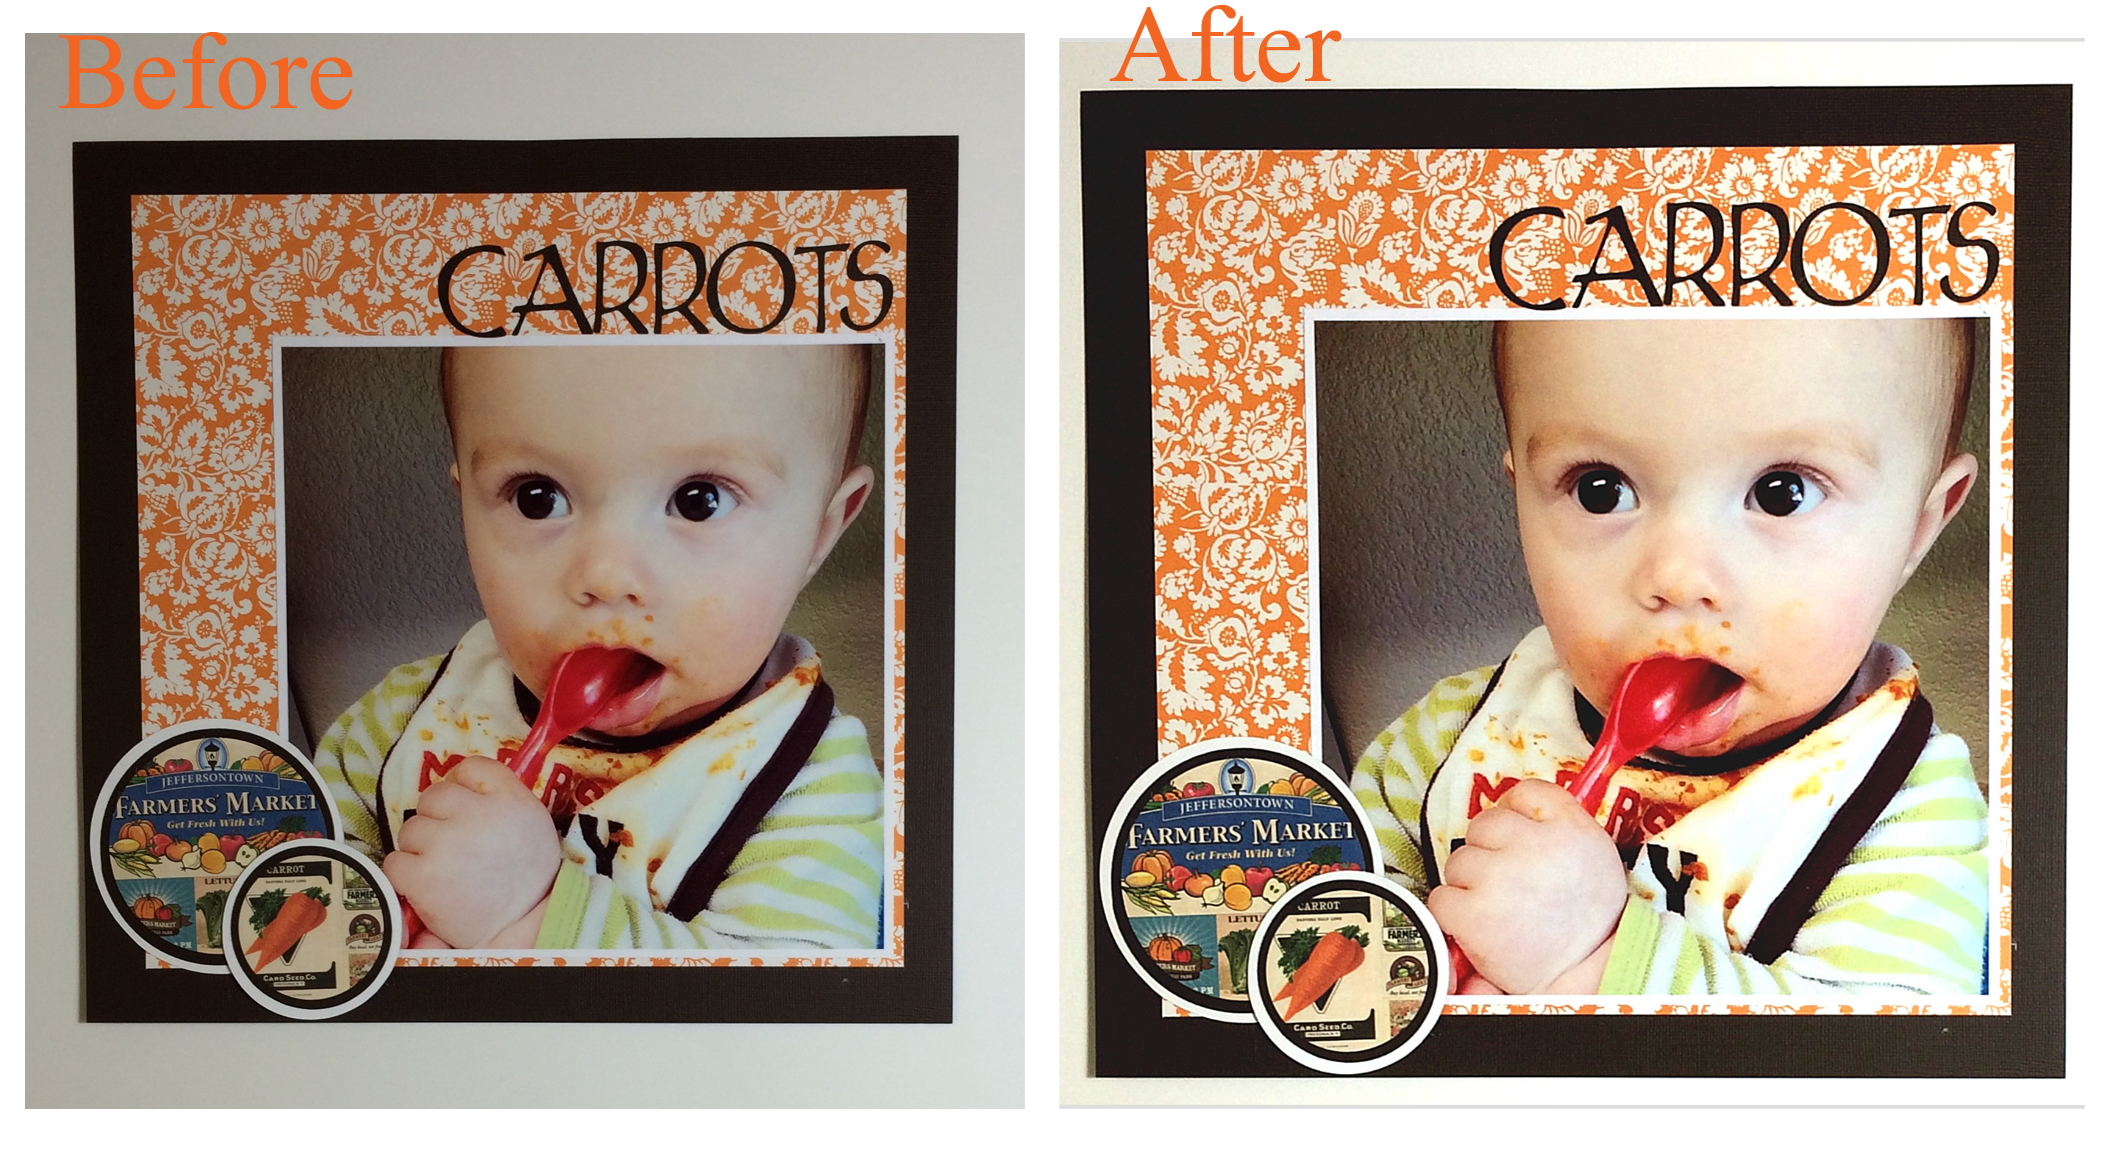
1. Purchase a large white poster board from the craft store (around $1.00). It helps to clear the background in the pictures and provide a nice, neutral base. I like to use the shiny side too, in order to get the most out of my available light source.
2. Choose your poster board position carefully. As you can see, I like to have mine next to my craft room window. I also used a standing OTT light to the right, to help balance the light (you don’t want a lot of shadows).
Here is the view of my “photo studio” wall.
3. Stick a piece of tape behind the layout and affix it to the board.
4. Take the photo using some kind of stabilizing structure. I don’t have a tri-pod, so I usually use my desk with a box on it to help hold the phone steady. Take several pictures so you can choose the best one.
5. I then clean up the image using either www.fotoflexer.com (a free site) or Afterlight (a $.99 app). You can use these to play with shadows and lighting, crop and rotate, etc. I also use Photoshop Elements 5.0 at the very end to add white paint to the background, making it as bright as possible.
Before and after editing my pictures.
That’s it! Now you can save and share your masterpieces!
With these tips, you can make sure your artwork is the focus – not a messy background.
Fall is the start of decorating season here at my house, and the warm colors of autumn make me feel all warm and cozy.
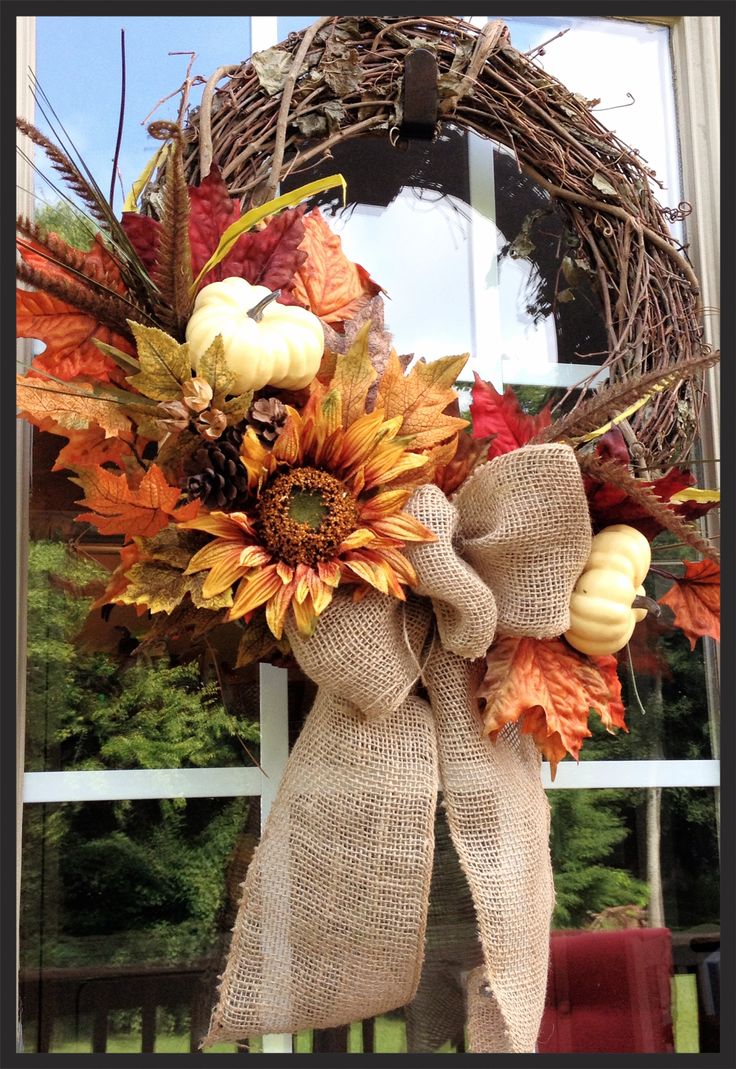
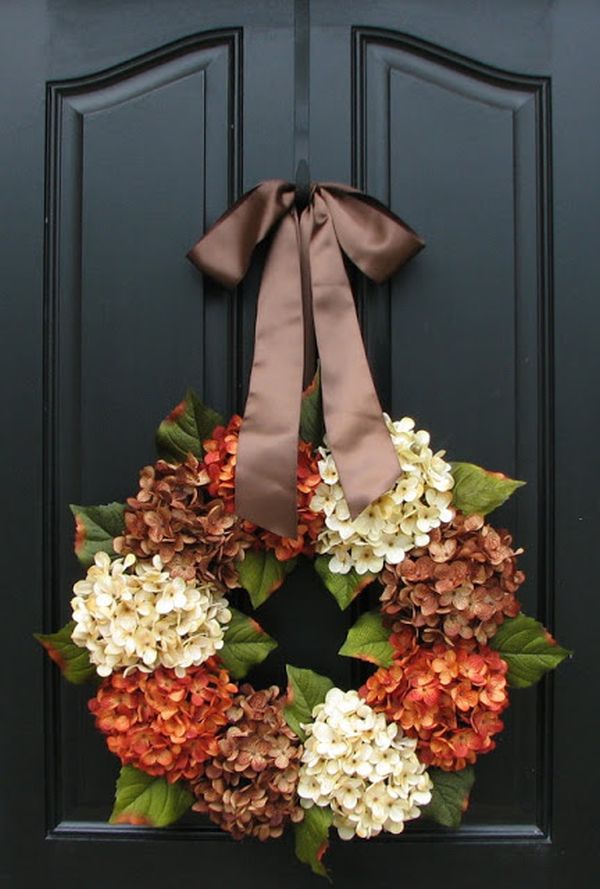
Nothing says cozy quite like a fabulous wreath on one’s front door. Also, is it just me, or have wreaths come a long way in the last few years? The amount of creative ideas are astounding! Here are five of my favorites.
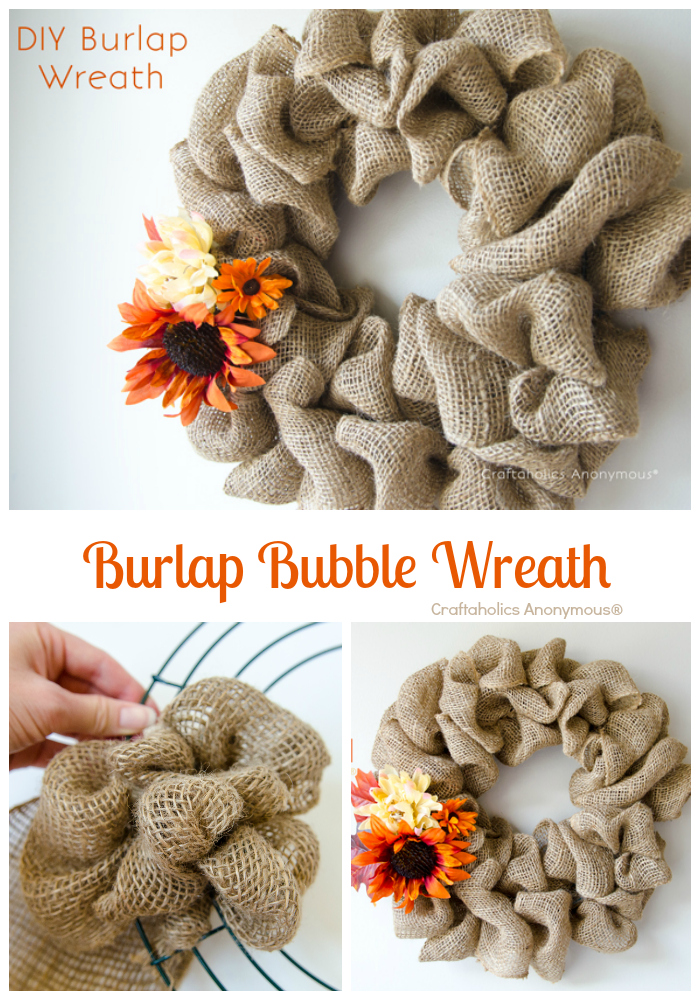
This one is available from Old Time Pottery.Love this floral wreath idea from Homedit.Burlap wreath how-to from Craftaholics Anonymous.
The burlap craze continues over at Craftaholics Anonymous! I’ve seen these wire frames at Michael’s and have always wanted to try this technique. I think it would make a fun kid’s craft, too.
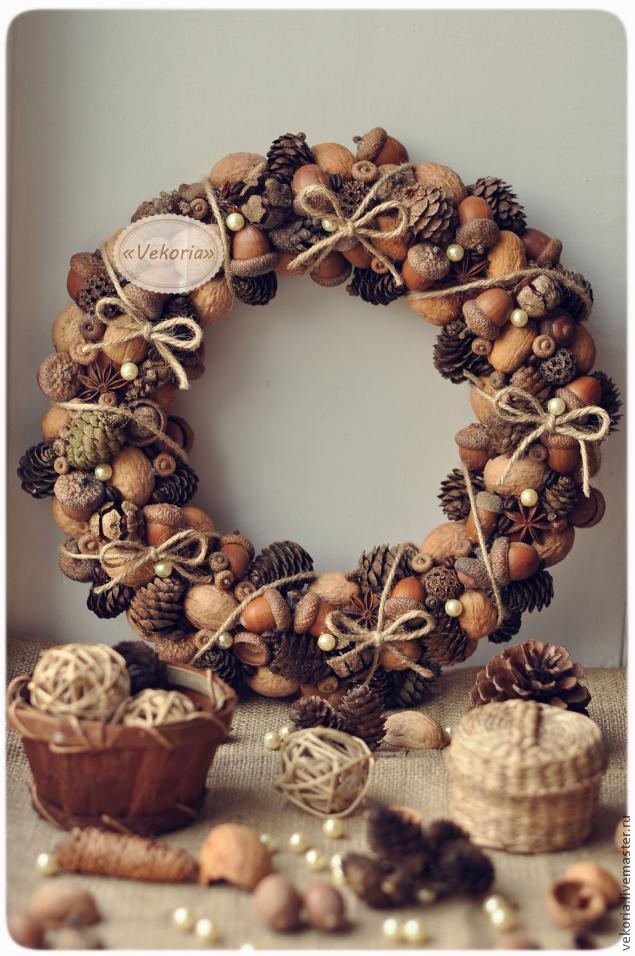
Wondering what to do with all the acorns and pine cones in your yard? Look no further! Check out this blog post to find step-by-step instructions.
Wood and burlap wreath DIY from Finding Home.
More use with natural elements, as can be found at Finding Home’s blog. The rustic nature of this wreath is right up my alley!
Hope you’ve found some inspiration for your own front door this holiday season. Thanks for stopping by to visit!
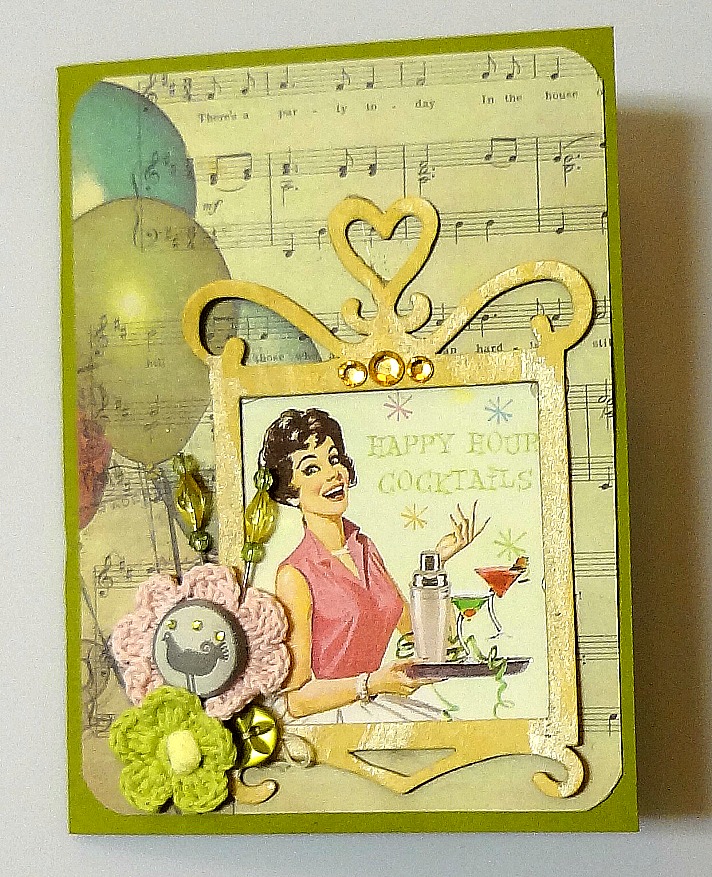
My work buddy loves the retro and Vintage style cards I make,
so I wanted to do something extra special for her this week.
I started with this fabulous balloon/music note sheet from Glitz Design
(I’ve been waiting to use it for over a year!)
I found some of these chipboard frames a little while back and painted this one a yellow gold to match the tones in this Vintage image. The frame was a perfect fit!
Clusters of embellishments really make a card (or layout) stand out.
Here I used several crocheted flowers, a fabric brad, hand-tied button and two pins.
Inside the card, I used a journal frame from Cosmo Cricket and stamped “Happy Birthday” on it, along with some flowers (there are tiny rhinestones in the center of each one, too).
My friend Callie and I share a passion for pin-ups! When she was recently promoted to Catering Manager in my sales office, I wanted to make her an extra-special card to welcome her.
This image was perfect, since it mixed a lovely retro pin-up girl with office supplies! lol
I love embellishing inside the cards, too. I think it adds 87 points to the fun factor (this card, for example, has a fun factor of 132, of course). 🙂
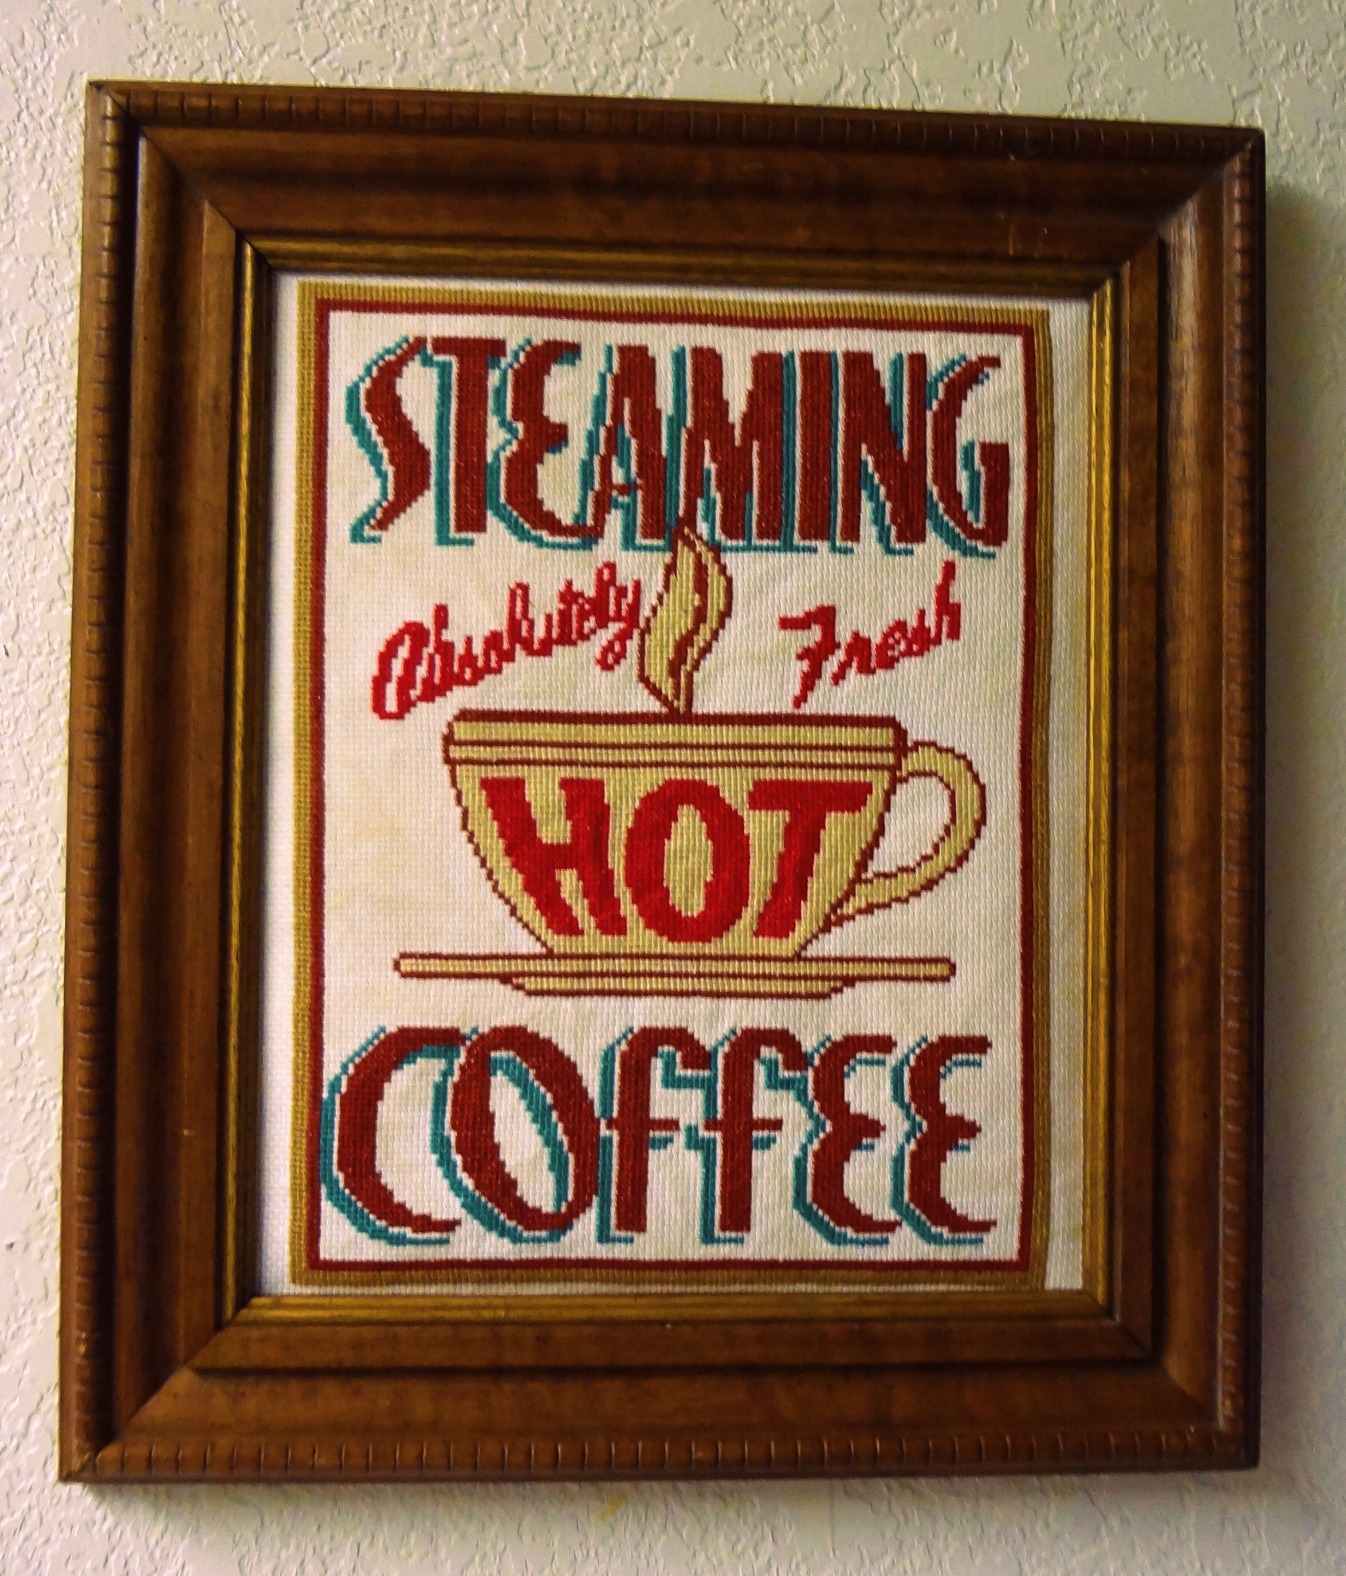
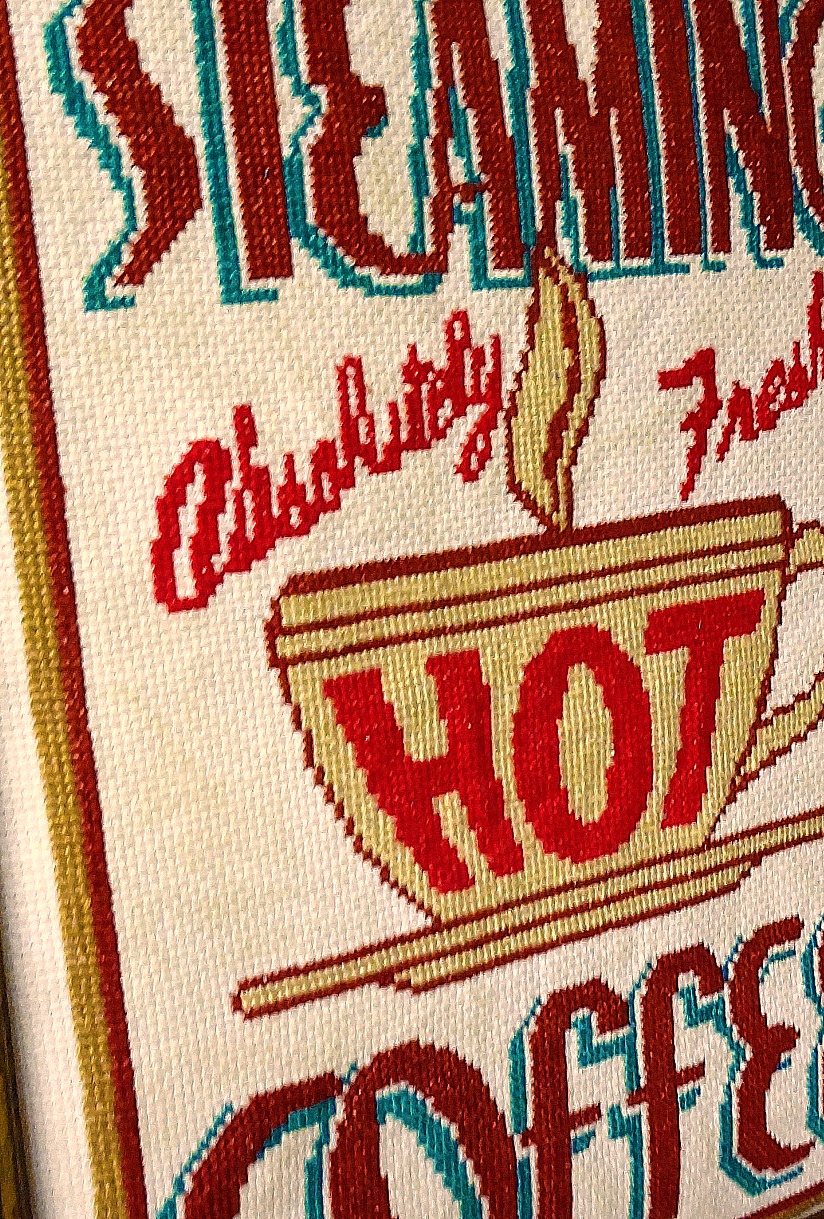
I recently finished this darling retro coffee ad for my kitchen,
but I was sorry that I used such a bright white fabric.
It just didn’t seem to match the 1950’s tone of the pattern.
Here is the finished piece with the white fabric:
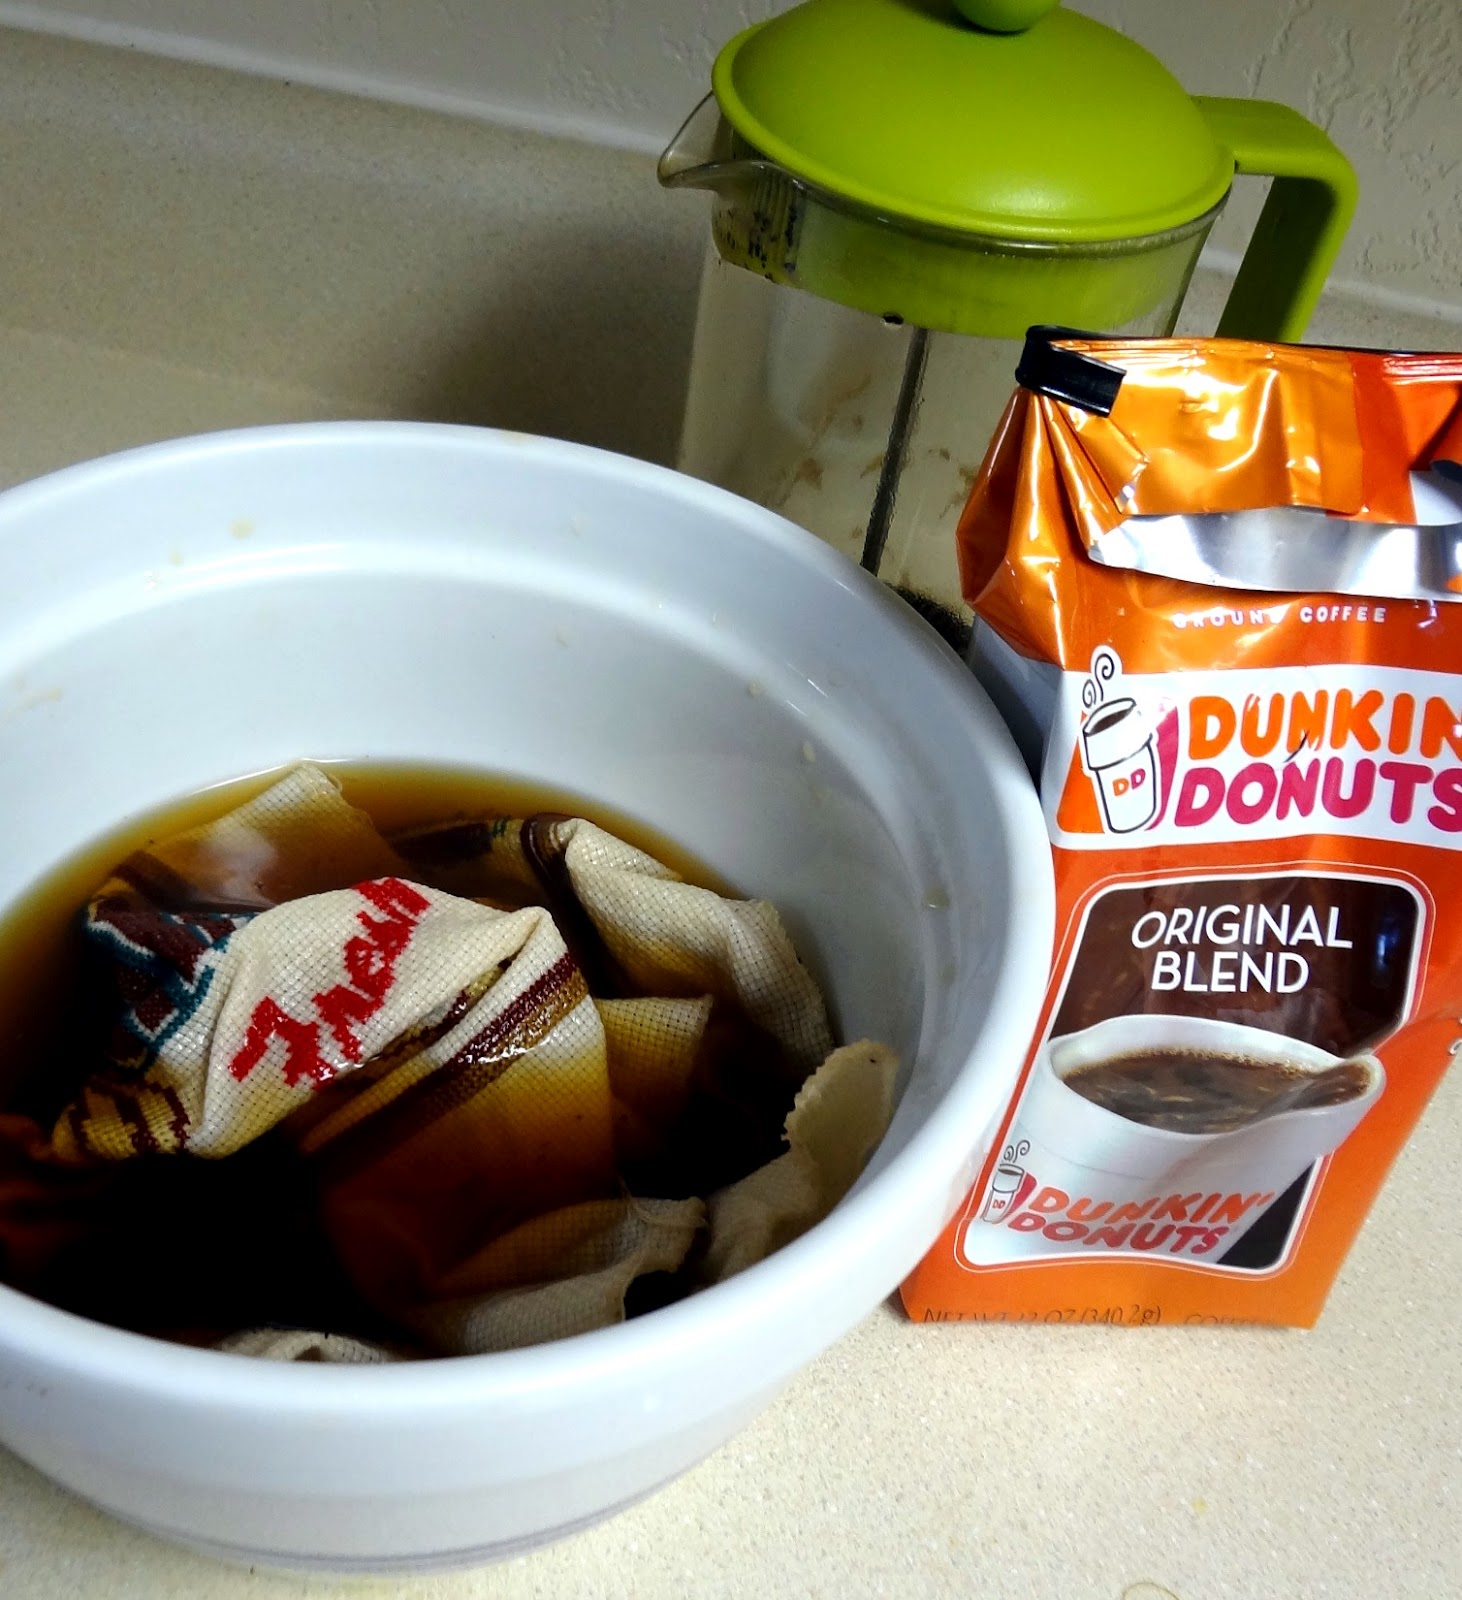
Well? I thought I would try dying the fabric in coffee to see how it would turn out.
Having never done it before, I was a little nervous,
seeing how I already had stitched the entire thing (I’ll never get those four months back…)
I started with really diluted coffee, since I wasn’t sure what the result would be and then slowly added more of the coffee into the bowl to darken it.
I checked the fabric every 10 minutes or so.
When I was happy with it, I rinsed it out with fresh water and let it hang dry.
Then, I ironed it out and framed it with a walnut frame I found at a flea market (perfect size!)
I probably could have gone a bit darker, too, but I didn’t want to alter the color of thread too much. Hope this inspires you to play with dying your own fabric – it’s really quite easy and lots of fun!